

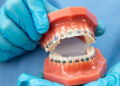
Do you have a beautiful logo, hand-drawn sketch, or custom artwork that you’d love to see embroidered on a hat, jacket, or tote bag? Great news — turning your design into stitches is easier than ever. You can now convert artwork to PES file format quickly and get stitching in no time!
If you’re looking for top-notch results without the stress of DIY digitizing, Digitizing Buddy offers reliable, affordable embroidery digitizing services that transform your artwork into crisp, stitch-ready PES files. Whether you’re an embroidery enthusiast or a small business owner, their pros ensure your designs sew out beautifully on any Brother or Babylock machine.
Now, let’s break down exactly how to go from concept to embroidery-ready with the PES file format.
What Is a PES File?
A PES file is a type of embroidery file format primarily used by Brother and Babylock machines. It contains everything your embroidery machine needs to know — from the stitch type and density to the color changes and pattern layout.
Unlike a basic image file (like JPEG or PNG), a PES file is a specialized, machine-readable format that tells your embroidery machine how to sew the design. It’s the secret ingredient that transforms flat images into textured masterpieces.
Why Convert Artwork to PES?
Turning artwork into a PES file unlocks the ability to stitch custom, creative designs onto garments and fabrics with incredible accuracy.
Here’s why people love converting artwork to PES:
- Professional branding: Embroider your logo on uniforms, caps, or promotional gear.
- Personalized gifts: Turn your kid’s drawing or pet photo into heartfelt keepsakes.
- Creative freedom: Bring your art to life with thread, texture, and color.
- Commercial applications: Offer customized embroidery services using your original designs.
Whether you’re working on client orders or stitching for fun, the ability to convert artwork into PES format gives you the creative control you need.
How to Convert Artwork to PES File
There are a few different ways you can go about this, depending on your skills, tools, and time.
1. Use Embroidery Digitizing Software
Programs like Embrilliance, Hatch, or Brother’s PE-Design allow you to import images and manually digitize them by assigning stitch types and directions.
Pros:
- Full control over design
- Great for experienced digitizers
2. Try Online PES Converters
There are some online tools that offer basic image-to-PES conversion.
Pros:
- Quick and free
3. Hire a Professional Digitizing Service
This is by far the most efficient and reliable option. Simply upload your image, specify size and machine type, and receive a perfectly optimized PES file.
Digitizing Buddy is a trusted name in the industry. They offer:
- Expert manual digitizing (no auto-generated junk)
- Clean, efficient stitch path
- Support for custom sizes and placements
- Quick turnaround times
This approach ensures that your final embroidery looks just like your original artwork — with flawless stitch execution.
Tips for Better PES Conversions
Want your artwork to look amazing when stitched? Here are some expert tips:
Choose High-Quality Artwork
Start with a clear image. Avoid blurry or low-resolution files. Vector files (like AI, SVG, or EPS) are ideal, but clean PNGs or JPEGs work too.
Keep It Simple
Embroidery is thread-based, not pixel-perfect. Thin lines, tiny text, and complex gradients may not stitch well. Simplify your design if needed.
Know Your Fabric
Thick or stretchy fabrics behave differently when embroidered. Let your digitizer know what you’ll be stitching on — they’ll adjust the file accordingly.
Specify Size
Always decide how big (or small) you want the final design. A logo that looks great at 4 inches may lose detail if shrunk to 1 inch.
What Can You Stitch with PES Files?
Once your design is converted to PES format, the creative possibilities are endless. Here are a few fun ideas:
- Caps and hats
- Jackets and hoodies
- Tote bags and backpacks
- Baby bibs and blankets
- Patches and labels
- Company uniforms and aprons
- Wedding or event monograms
Your PES file becomes the blueprint for all your embroidery adventures.
Fast, Easy, and Reliable – Use Digitizing Buddy
Let’s face it — digitizing isn’t always a walk in the park. If you’re not ready to dive into complicated software or risk a failed stitch-out, leave it to the professionals.
Digitizing Buddy delivers:
- Clean, precise stitch files
- All major formats (PES, DST, VP3, EXP, and more)
- Rush orders if needed
- Affordable pricing with top-tier quality
- Friendly customer support
Whether you have a one-time request or need ongoing digitizing for your brand, they’ve got your back.
Ready to Convert Your Artwork to PES?
Here’s a quick checklist to get started:
- Prepare your design (PNG, JPG, SVG, PDF – almost any format works)
- Decide on your desired size
- Know your embroidery machine brand and hoop size
- Upload your artwork and get your PES file delivered fast!
That’s it. No headaches, no guesswork — just beautifully stitched results.
Final Thoughts
Whether you’re crafting for fun or branding your business, converting your artwork to PES file format is the key to getting stunning embroidery results. With the right file, your embroidery machine can turn your vision into thread — one precise stitch at a time.
And if you’re not sure how to start or simply want professional results, Digitizing Buddy is your go-to source. Upload your design, and let them handle the rest.


