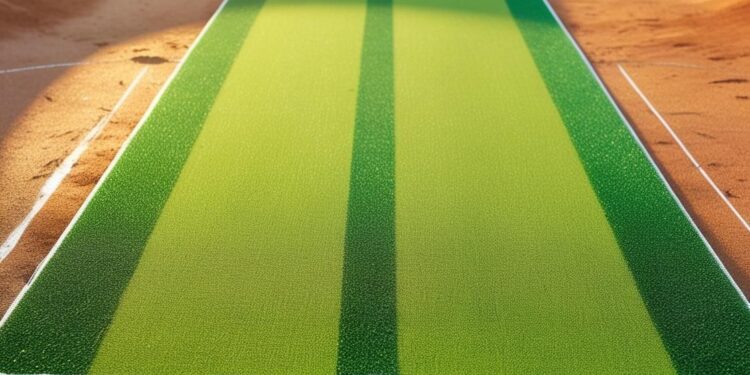
Artificial cricket pitches outlast natural turf and require less maintenance. This consistent play can be used for training, local matches, and professional games. Building an artificial cricket pitch is a practical solution for clubs and enthusiasts who want a backyard practice area. This step-by-step guide will help you build an artificial cricket pitch from preparation to completion. You can build a high-quality pitch-like surface with the right materials and planning.
Planning and Preparation
Construction of an artificial cricket pitch begins with planning. Decide, where to build the pitch. Choose a flat, well-drained area. The standard cricket pitch length is 22 yards (20.12 meters), but width can vary depending on space. Mark dimensions clearly to guide construction.
Before starting construction, get artificial turf, a shockpad, a base layer, and drainage systems. High-quality materials are necessary for pitch longevity, and performance.
Preparing the Base
Pitch stability and durability depend on the base layer. Clear the ground of debris, grass, and uneven surfaces. The next step is to dig 75-100mm. This will solidify the pitch.
After leveling the ground, pack it down to make a stable surface. This keeps the pitch from sinking and becoming uneven. Adding a layer of gravel or crushed stone can make the pitch more stable and help water drain away. A prepared base is necessary, for a successful installation.
Installing the Drainage System
Drainage is very important for an artificial cricket pitch because standing water can damage it and make it impossible to play on. Drainage should be put under the base. To do this, perforated pipes or geotextile fabric, must be put down to let water drain from the pitch. For water to flow off easily, the drainage system should have a slight slope.
Spread the drainage system out evenly across the pitch to keep it dry and playable and stop water from pooling. Your artificial cricket pitch will last longer, if you keep water from damaging it.
Laying the Shockpad
The base and drainage system are cushioned by a shockpad. This layer supports players and reduces injury risk. It also makes the pitch bounce and feel more realistic and comfortable for players.
Different shockpads are made of foam, rubber, or composite. Choose one that fits your budget and pitch cricket. Spread the shockpad evenly across the area to avoid gaps. Fix the shockpad with adhesive or other methods.
Installing the Artificial Turf
The most crucial step is laying the artificial turf. The turf should be cricket-specific for grip, bounce, and wear resistance. Roll the turf over the shockpad, aligning the edges and avoiding wrinkles.
Secure the turf edges with specialized adhesive or fasteners after laying it out to keep it in place. To make the pitch as fit cut off the edges, that are too long. Get rid of any lumps, and air pockets in the surface, to make it flat.
Adding Sand or Rubber Infill
To make your artificial cricket pitch work better, and last longer, fill it with sand, or rubber. This stabilizes the turf, and gives it cricket-specific bounce. The infill prevents turf shifting.
Spread the infill evenly across the surface to settle into the artificial turf fibers. To avoid clumping, distribute infill evenly with a broom or mechanical brush. Overfilling the pitch can reduce bounce and playability.
Finishing Touches and Maintenance
Finishing touches are needed after the artificial cricket pitch is built. Install boundary lines and any desired features like nets or stumps. Anchor the pitch edges to prevent lifting and movement.
Regular maintenance keeps the pitch, in good condition. Brushing debris off, topping up infill, and checking the drainage system for blockages are all part of this. Your artificial cricket pitch will last for years with proper care.
Conclusion
Building an artificial cricket pitch is a rewarding project, that can improve your cricket experience as a player, coach, or fan. This step-by-step guide can help you to build a durable, playable pitch. Pitch longevity depends, on proper preparation, installation and maintenance.
OSMS Turf provides expert advice, and top-tier cricket turf for building an artificial cricket pitch. Their expertise can help you create a pitch that performs at the highest level, giving you an edge on the field.
FAQs
What types of turf are available?
OSMS Turf offers 3 types:
- 9mm Astro Turf (shorter grass)
- 15mm Multisport Turf (Dark Green)
- 15mm Multisport AJ (Light Green)
How is the pitch installed?
The process starts with checking the site and understanding the requirements. Then the ground is prepared to be flat and firm. The turf is carefully laid down and adjusted to fit the area. After installation, everything is inspected to ensure it meets the expected quality.
- Site is checked
- Ground is prepared
- Turf is laid down properly
- Final quality check is done
Why should someone choose OSMS Turf?
OSMS Turf uses top-quality materials and has a skilled team for professional installation. They offer customized solutions depending on your space and needs, and they support you through every step of the process—from selection to setup.


